


Smart Holiday Décor Organization Tips for Sorting Storage Labeling and Safety
Holiday decorating feels magical when the bins open and everything is clean, untangled, and easy to find. It feels less magical when ornaments are cracked, light strings are knotted, and no one remembers where the wreath hooks went.
A good system saves time every season. It also protects fragile pieces, reduces clutter, and makes decorating feel more intentional. These smart holiday décor organization tips cover sorting, storage bins, labels, rotation plans, and safety so setup and cleanup both become easier.

1. Sort decorations by holiday first
The easiest place to start is with broad holiday categories. Separate Christmas, Hanukkah, Halloween, Thanksgiving, Easter, New Year’s, patriotic décor, birthdays, and seasonal pieces.
This prevents one crowded “holiday” bin from becoming a year-round mystery box. It also helps when one season overlaps another. Fall wreaths, Thanksgiving table linens, and Halloween porch décor may all live near each other, but they should not be mixed together.
Use a large open area, such as a dining table or clean floor, and make piles before choosing containers. If a piece works for more than one holiday, place it in the category where it gets used first during the year.
A simple sorting rule helps:
Keep it if it is loved, used, or meaningful
Donate it if it is in good shape but no longer fits your home
Repair it only if you will fix it before the next season
Toss it if it is broken, unsafe, or missing key parts
Be honest during this step. Storage space should hold items you actually use, not decorations you feel guilty about keeping.
2. Group items by decorating zone
After sorting by holiday, sort each holiday by where the décor goes. This makes setup faster because each bin can go directly to the right room.
Useful zone categories include:
Front porch and outdoor entry
Living room mantel
Tree ornaments and tree trim
Dining table and kitchen
Guest room and bathrooms
Yard displays
Gift wrap and greeting cards
This approach works especially well for larger collections. A “Christmas living room” bin can hold mantel garland, stocking holders, candle rings, and shelf décor. A separate “Christmas tree” bin can hold ornaments, hooks, ribbon, and the tree topper.
If your collection is smaller, combine zones while still keeping like items together. For example, one bin can hold “Thanksgiving table and mantel” pieces if both areas are decorated at the same time.
3. Use the right storage bins for protection
Storage bins do more than hide clutter. They protect delicate items from dust, moisture, pests, crushing, and temperature swings.
Clear plastic bins are popular because the contents are visible at a glance. Opaque bins can work just as well if they are labeled clearly. Choose sturdy bins with tight-fitting lids, especially for garages, basements, attics, and storage closets.
Match the bin to the item:
Decoration type | Best storage choice |
Fragile ornaments | Divided ornament boxes or padded bins |
String lights | Reels, cord wraps, or flat cardboard holders |
Wreaths | Wreath bags or round containers |
Garlands | Long bins with gentle coils |
Candles | Small bins kept away from heat |
Figurines | Tissue, bubble wrap, or cloth padding inside bins |
Avoid overpacking. If the lid has to be forced shut, fragile items inside may crack or bend. Leave a little breathing room, then fill gaps with tissue paper, soft cloth, or reusable packing material.

4. Label every bin in a way that makes sense later
A label should answer one question fast: what is inside this bin?
Write labels large enough to read without pulling the bin down from a shelf. Place labels on at least two sides, such as the front and one end. If bins are stacked or turned sideways, the label still shows.
Good labels are specific:
`Christmas tree ornaments, red and gold`
`Halloween porch lights and extension cords`
`Thanksgiving table linens and napkin rings`
`Gift wrap, tags, ribbon, and tape`
`Outdoor wreaths and door hangers`
Color coding can help too. Use green labels for Christmas, orange for Halloween, blue for winter, and brown or gold for fall. Keep the system simple enough that everyone in the household can follow it.
For extra clarity, tape a short inventory list inside the lid. This is helpful for bins full of small items, such as ornament hooks, spare bulbs, batteries, clips, and tabletop pieces.
5. Create a rotation system to keep decorating fresh
A rotation system keeps décor from feeling stale and stops every surface from becoming crowded. Instead of using every item every year, choose a theme, color palette, or focus area.
Try a three-bin rotation:
Year A
Classic pieces and family favorites
Year B
Natural textures, greenery, wood, and warm neutrals
Year C
Bright colors, metallics, or novelty pieces
You can also rotate by room. Use special pieces in the living room one year, then move them to the dining room the next. Keep sentimental items in a “use every year” bin so they never get lost in the rotation.
At the end of each season, make a quick note on a sticky label or index card. Write what worked, what stayed packed, and what needs replacing. Store that note in the top of the main bin. Next year, you will not have to rely on memory.

6. Store fragile and sentimental pieces with extra care
Not every decoration belongs in a general bin. Heirloom ornaments, handmade pieces, glass figures, ceramic villages, and framed holiday photos need extra protection.
Wrap each fragile item on its own. Use acid-free tissue for paper keepsakes, soft cloth for delicate surfaces, and bubble wrap for pieces that can handle it. Place heavier items at the bottom and lighter items on top.
For ornaments, divided trays are worth the space. They stop pieces from knocking into each other. If you do not have ornament trays, use egg cartons for small ornaments, cardboard dividers, or cups inside a shallow bin.
Keep sentimental items in smaller containers inside the larger holiday bin. Label that inner container clearly so it does not get treated like everyday décor.
7. Keep lights, cords, and batteries organized safely
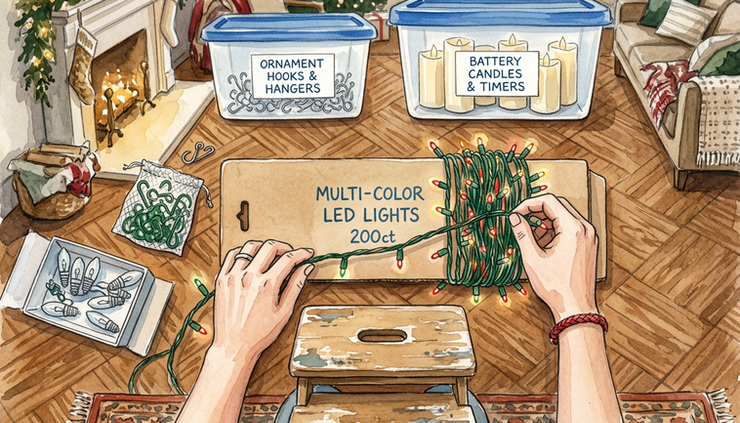
Holiday lights can turn into the biggest mess if they are tossed into bins loose. Wrap each strand around a cord reel, a sturdy piece of cardboard, or a plastic hanger. Secure the ends with twist ties or reusable cable ties.
Before storing lights, check for:
Cracked bulbs
Frayed wires
Loose plugs
Missing covers
Signs of overheating
Discard damaged light strands instead of saving them “just in case.” Store extension cords with the décor they support, especially outdoor cords used for porch lights or yard displays.
Remove batteries from flameless candles, musical decorations, remote controls, and lighted figures before packing them away. Batteries can leak over time and damage the item. Store batteries separately in a cool, dry place, away from metal objects.
8. Follow safety habits when packing and lifting
Holiday cleanup often happens when everyone is tired. That is when accidents happen.
Use a sturdy step stool instead of standing on chairs or storage bins. Lift with bent knees and keep heavy bins close to your body. Store the heaviest containers on lower shelves so no one has to pull weight down from overhead.
Keep walkways clear while packing. Stray ornament hooks, loose cords, and open bins can become tripping hazards.
Choose storage locations with care. Avoid placing candles, wax décor, photos, and delicate handmade items in hot attics. Keep paper décor away from damp areas. Outdoor decorations should be fully dry before storage to help prevent mildew and rust.
9. Make unpacking next year simple
Before closing each bin, pack it in reverse order. Items needed first should sit on top. For example, tree stand parts, light clips, extension cords, and hooks should be easy to reach before ornaments and finishing touches.
Create one “open first” bin for each major holiday. It can include:
Door wreath
Mantel basics
Light timers
Hooks and clips
Batteries
Favorite small decorations
A short setup note
This single bin gives the season an easy start, even if the full decorating day comes later.
The best system is the one you will repeat
The top pick for a lasting holiday décor system is simple: sort by holiday, store by zone, label clearly, and rotate with intention. That combination keeps decorations protected, easy to find, and fun to use.
Start with one holiday instead of the whole house. Empty the bins, sort what you own, choose better containers where needed, and label everything before it goes back on the shelf. Next season, decorating will feel less like a search party and more like the tradition it should be.
And most importantly, have a safe and eventful holiday everyone!


Comments